Showing posts with label Skirts. Show all posts

March 9, 2013

High Low Skirt Refashion


Hey folks!  I rarely get sucked into fads and trends.  I like to stick with the classics.  This is usually the case because the trends are immodest or weird.  High-Low skirts fall on the weird side of the spectrum for me.  "Wait, you like that bit of fabric dragging behind you?"  It reminds me of tuxedo tails, and I'm not a big fan of those either.  The really short ones are like a reverse mullet.  You know, except, "party in the front and business in the back" instead of the other way around.

Yeah, so after all that, I still made one. :-)  It can't hurt to try right?  It looked SO easy, it wouldn't cost me anything, and I didn't have to make a "mini skirt with a cathedral train" version.  So here 'tis.  Let me know what you think.


 Before: A mis-shapen skirt I picked up at Goodwill over a year ago to turn into something else.  The front had stretched out and the back hadn't so it was awkward to wear the way it was. The colors, however, are so in right now.  It's funny how trends always come around again.

 1. Try the skirt on.  On the center front, mark where you want the highest part of the hem to be.

2.  Lay the skirt out with the side-seams matched and in the middle.  The center front is the fold on the bottom.  Find you pin.  Start cutting there and gently slope towards the bottom of the skirt as you cut up. Remember to leave room for the hem!  I didn't :-( and it's a bit shorter in the front than I thought it would be.

 3. Try it on and see if you like the drape and lines.  Mine (honestly I thought it looked weird) turned out almost perfect.  I only adjusted one area.


My skirt had a built in lining, which is nice.  I evened out the longer hem so it wasn't so pointy.


4. If your skirt has a lining, pull the main fabric out of the way and trim it straight across just above the highest point.  If you don't, then you'll see the lining when you wear your skirt.

5. Hem your skirt, Hem the lining.  All done!
See?  No more unsightly lining. :-)


Chambray shirts are in, right?  :-)  


P.S. I love tying my shirts.  And I'm going to make some specifically for tying this spring/summer. :-)  Knots and bows are the bomb.


Let's have a round of applause for massive Mr. mirror in the studio.  He makes my life so much easier.

Day light savings tonight folks!

February 27, 2013

Pepsi Blue Pencil Skirt


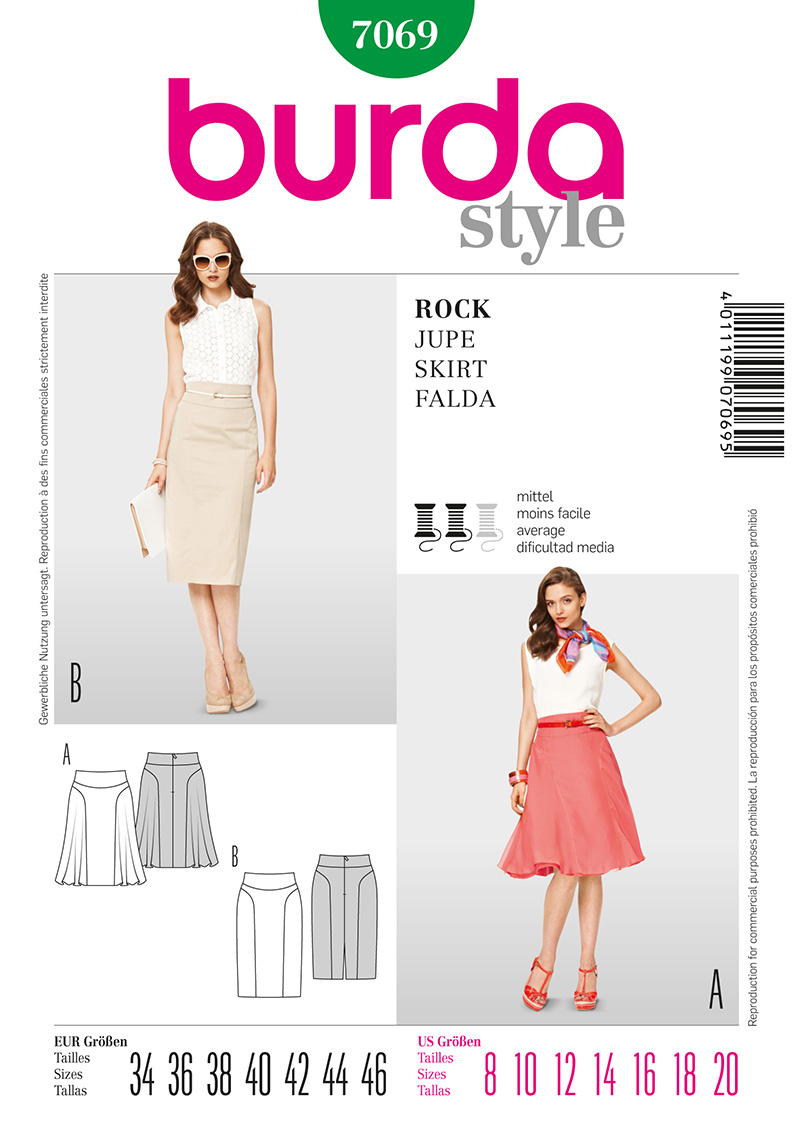
Pattern: Burda Style 7069 view b with lining
Supplies: Wool from mother, zipper form stash, sheet lining, rayon waist facing from stash (a preview of one of my spring projects. :-)

The moths got into my mom's fabric collection a while ago and ate some holes through this beautiful length of bright blue wool.  She was going to get rid of it, but I snagged it and figured I could work around the holes.  It has been sitting in my stash for a couple years just waiting for the perfect project.

Then I saw this picture on facebook:


The lovely Mimi and Hosanna!
I met them at Winter Retreat, and you met them here. Anyway, Hosanna is super cute and always fashionable.  I saw these pictures on facebook and got inspired to make this skirt!  I knew I had the wool in my stash and had just gotten this burda pattern for the other version, so it was a no brainer!  She was so kind as to let me use her picture. :-)  Thanks Hosanna!

At Joann Fabrics the other day I looked at the wool and it was priced $36 a yard.  Yikes.  So this skirt would have cost at least $50 for just supplies.  With the time and custom tailoring *wink* this skirt is probably worth $100.  And I didn't pay anything.  Frugality FTW!


I've ironed this like crazy, but it was folded for so long that the crease in the front is especially stubborn.  Hence the wrinkles.

I'm so glad I checked the measurements on the pattern envelope on this one.  Burda is made in GERMANY.  Their patterns are made to flatter american women, they say it like it it.  I run a size 10 in Simplicity and Butterick and McCalls pretty consistently, but I made a 14 in this and it was almost perfect (it was a little tight for my closet).


Back slit.  I took these before I hemmed it, but I used an invisible hem anyway, so you can't see it. ;-)

View B is very long.  I wanted a knee length skirt, so I ended up cutting probably 4 inches off the lining and 1 1/2 inches off the wool before I took massive hems out of both.


 Outside: Front - Back (pre-hemming, obviously. :-)


 Inside: Front - Back


Nice neat lining on the inside. :-)


I didn't have an invisible zipper, so I just did the simplest/smallest insertion I could.


I purposely put a different fabric in for the facing because I just love articles of clothing (especially shoes!) that have that surprise creative fabric.  It just makes me smile.  Seriously.  All other things being equal I would choose the piece with the cute inside.


After I finished the skirt I put is on with heels and everything and found that it was the perfect pencil skirt.  Bummer.  See, pencil skirts are designed these days to be a little more than just straight, they like to hug you.  What I'm trying to say is that is was to tight.  Some things just...uh, don't need extra attention.  So I had to go back in and let it out a bit.


Now my grandma, mom, and both my brothers are happy with it. :-)  
Oh, and I'm happy with it too, I think I forgot to mention that...

Can't wait to use this pattern again with the other view or maybe a black pencil?  Everybody needs one of those, don't they?

Great!  Now, how to work this super loud and bouncy piece into my rather quiet and laidback wardrobe?? ;-)

September 10, 2012

Denim Play Skirt


Clothes for little kids are so quick and easy to make!  This skirt took about 2 hours.  


The 8 flared gores are cut from 2 different pairs of old jeans, serged together and top-stitched.
I saved the top of one of the pairs to make a tiered skirt for myself sometime later.


Add a simple elastic waistband...


Zigzag and start a frayed hem...


and Emily has a new skirt to play in!

That's how we roll.

August 24, 2012

Sparkly Denim Circle Skirt


Pattern:McCalls 5811 view B
Fabric: Sparkly medium wight denim (Joann's red tag)

I made this skirt almost a year ago for a Barn Dance.  I wanted a fun circle skirt that would look good at the dance as well as in regular life.  I didn't buy the sparkly denim for the project but it looked fun so I gave it a whirl.  After numerous washing the glitter has come out of the denim, but that is fine.  I still has a nice dark wash skirt. :-)


I used view b of the McCalls pattern only I didn't make it quite a full circle and I drafted my own waistband.  I'm not sure why.  It was a while ago. :-)  I wanted the fun swish and petticoat compatibility so it is still very full but I've found that the full circle is just too much.


I've not yet learned to lengthen the backside of my skirts so that I get an even hem.  I never think about it till the skirt is done and hemmed. .:-)  As you can see there is a side covered zipper and the waistband connects with hooks and eyes.  I have since purchased the larger flat version of the hook-and-eye because I like their stability and look better, but I didn't have them for this so I used 2 small sets.
I usually wear a belt, so it doesn't look too bad.


I put this on for pictures straight out of the wash, so the covered zipper isn't laying flat like usual and you can see the bias tape on the hem in my twirly pictures. :-)  Bellow is a picture from the Barn Dance.  If you look in the lower right corner you can barley see my zipper.  That is the way it is supposed to be and looks when you iron it. 


I love this method of using bias tape and then doing an invisible hem.  When you iron it (which I didn't) you can't even see the hem.  That is rare on circle skirts because they are usually so hard.  I always hand stitch this latter part of the hemming process.


While fitting the skirt part to the waistband I was stretching the fabric and when I got to the straight of grain is ripped like 3 inches!  Devastation!  Not really. It just took a piece of fabric behind and 2 failed patch attempts before I found something that looks right and doesn't need any maintenance.


 Now I wear it with all sorts of things and fun belts. White above.  Black below.